The “GetDeviceRemovedReason” error can be incredibly frustrating, especially when it interrupts your gaming experience. This error is typically caused by issues with your GPU (graphics processing unit) losing connection with your system. Whether you’re playing graphics-intensive games or running demanding applications, this error can strike unexpectedly.
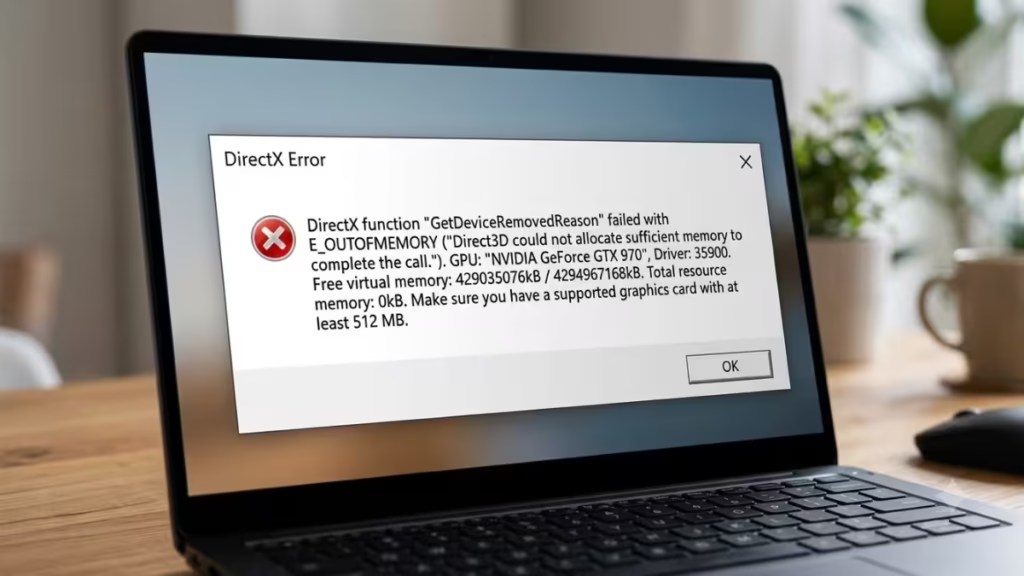
DirectX Error: DirectX function “GetDeviceRemovedReason” failed with E_OUTOFMEMORY (“Direct3D could not allocate sufficient memory to complete the call.”).
What is GetDeviceRemovedReason?
The “GetDeviceRemovedReason” error is a function within DirectX that indicates why the GPU stops communicating with the system. This error is often related to:
- GPU Overheating or Overclocking: Overclocking increases the GPU’s workload and can lead to overheating, causing the error.
- Outdated or Incompatible Graphics Drivers: Older or buggy drivers may fail to maintain stable GPU communication.
- Registry Misconfigurations: Certain Windows registry settings related to GPU response times can trigger the error.
- Hardware Acceleration Conflicts: Features like Shadow Play or Anti-Aliasing can clash with the GPU.
- Power Management Settings: Improper GPU power settings can force the GPU to disconnect.
- Corrupted System or Game Files: Damaged Windows system files or game installation files can also cause this error.
How to Fix the GetDeviceRemovedReason DirectX Error
Below are tried-and-tested solutions to resolve the “GetDeviceRemovedReason” error:
1. Restart the Display Driver
The fastest first step is to restart your display driver without rebooting your PC. Press Win + Ctrl + Shift + B simultaneously. Your screen will go black for a second, then return to normal. This forces Windows to reset the GPU connection and clears temporary driver hangs. If the error appeared mid-session, try this before anything else.
2. Turn Off Shadow Play or In-Game Overlay (GeForce Experience)
The Shadow Play feature in GeForce Experience can sometimes conflict with GPU stability. Disabling it often resolves the issue:
- Open GeForce Experience and run it as an administrator.
- Go to the General tab on the left panel.
- Turn off the In-Game Overlay or Share feature.
- Save your settings and reboot your PC.
3. Modify Registry Settings
Adjusting the TDR (Timeout Detection and Recovery) settings in the Windows registry can prevent the GPU from being disabled when it’s unresponsive for short periods.
- Press
Win + Rto open the Run dialog box. - Type
regeditand press Enter. - Navigate to:
Computer\HKEY_LOCAL_MACHINE\SYSTEM\CurrentControlSet\Control\GraphicsDrivers - Right-click on the blank space and select New > DWORD (32-bit) Value.
- Name it
TDRLeveland set its value to 0. - Save the changes and restart your computer.
Note: Setting TDRLevel to 0 disables GPU timeout detection, which can help prevent the error, including “GetDeviceRemovedReason.”
4. Disable Anti-Aliasing in Nvidia Control Panel
Anti-Aliasing, while improving visual quality, can sometimes cause GPU instability. Disabling it may help:
- Right-click on your desktop and select Nvidia Control Panel.
- Navigate to Manage 3D Settings > Global Settings.
- Turn off all Anti-Aliasing options.
- Click Apply to save the changes.
5. Update or Roll Back Graphics Drivers
Outdated or buggy graphics drivers are a common culprit for this error.
To Update Drivers:
- Open Device Manager by searching for it in the Start menu.
- Expand Display Adapters and right-click on your GPU.
- Select Update Driver and choose Search Automatically for Updated Driver Software.
To Roll Back Drivers:
- Open Device Manager and right-click on your GPU.
- Select Properties and go to the Driver tab.
- Click Roll Back Driver to revert to a previous version.
6. Update DirectX via Windows Update
An outdated version of DirectX can trigger this error, particularly on newer games that require DirectX 12. DirectX does not have a standalone installer, so Windows Update is the only way to update it.
- Press
Win + Ito open Settings. - Go to Windows Update and click Check for updates.
- Install any available updates, including optional driver updates.
- Restart your PC after the updates install.
7. Disable Hardware-Accelerated GPU Scheduling
Hardware-Accelerated GPU Scheduling (HAGS) can sometimes cause GPU instability on certain driver and hardware combinations. Disabling it is worth trying if other fixes have not worked.
- Press
Win + Ito open Settings. - Go to System > Display > Graphics.
- Click Change default graphics settings.
- Toggle off Hardware-Accelerated GPU Scheduling.
- Restart your PC.
8. Underclock the GPU
If your GPU is overclocked, reducing its clock speed can stabilize its performance:
- Download and install MSI Afterburner.
- Lower the GPU clock speed by 50 MHz or more.
- Save the settings and test your game.
9. Adjust Power Management Settings
Improper power settings can cause the GPU to overwork and disconnect. Fix it by:
- Open Nvidia Control Panel.
- Navigate to Manage 3D Settings > Global Settings.
- Change Power Management Mode to Normal or Adaptive.
- Save and exit.
10. Limit In-Game Frame Rates
High FPS can overburden the GPU and trigger the error. Limiting your frame rate may help:
- Open your game’s settings menu.
- Set a frame rate cap to 60 FPS or lower.
- Save the changes and restart the game.
11. Repair or Reinstall the Game
Corrupted game files can cause DirectX errors even when your GPU and drivers are working fine. Start with a repair before doing a full reinstall.
To Repair the Game:
- Press
Win + Ito open Settings. - Go to Apps > Apps & features.
- Locate your game, click the three-dot menu next to it, and select Advanced options.
- Click Repair and wait for the process to finish.
To Reinstall the Game:
- Go to Apps > Apps & features in Settings.
- Find your game, click the three-dot menu, and select Uninstall.
- After uninstalling, delete any remaining game folders under
%appdata%by pressingWin + R, typing%appdata%, and removing the game folder. - Reboot your PC and reinstall the game from its original source.
Additional Tips
- Keep BIOS Updated: Ensure your motherboard’s BIOS is up to date.
- Monitor System Temperatures: Use tools like HWMonitor to check GPU and CPU temperatures.
- Disable Overlays: Turn off overlays for apps like Steam, Discord, or Nvidia Experience.
- Switch Display Ports: Try using HDMI instead of DisplayPort (or vice versa) to rule out port issues.
- Update Sound Drivers: Some users report that outdated Realtek audio drivers also trigger this error. Update them via Device Manager under Sound, video and game controllers.
The “GetDeviceRemovedReason” error can disrupt your gaming experience, but it is fixable with the solutions provided above. Whether it’s restarting the display driver with a keyboard shortcut, adjusting registry settings, disabling overlays, underclocking your GPU, or updating drivers, there’s a fix that’ll work for your setup. Consistency and careful monitoring of your system’s performance are key to avoiding these issues in the future.
If you’ve resolved this error using any of these methods, share your experience in the comments below. Happy gaming!